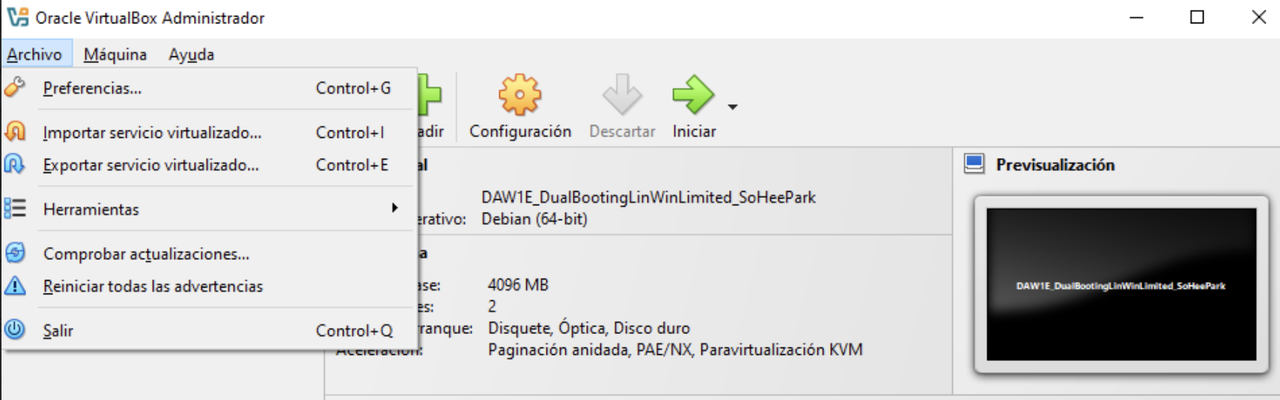
4.4 Virtual Machine Setting
💡 .vbox
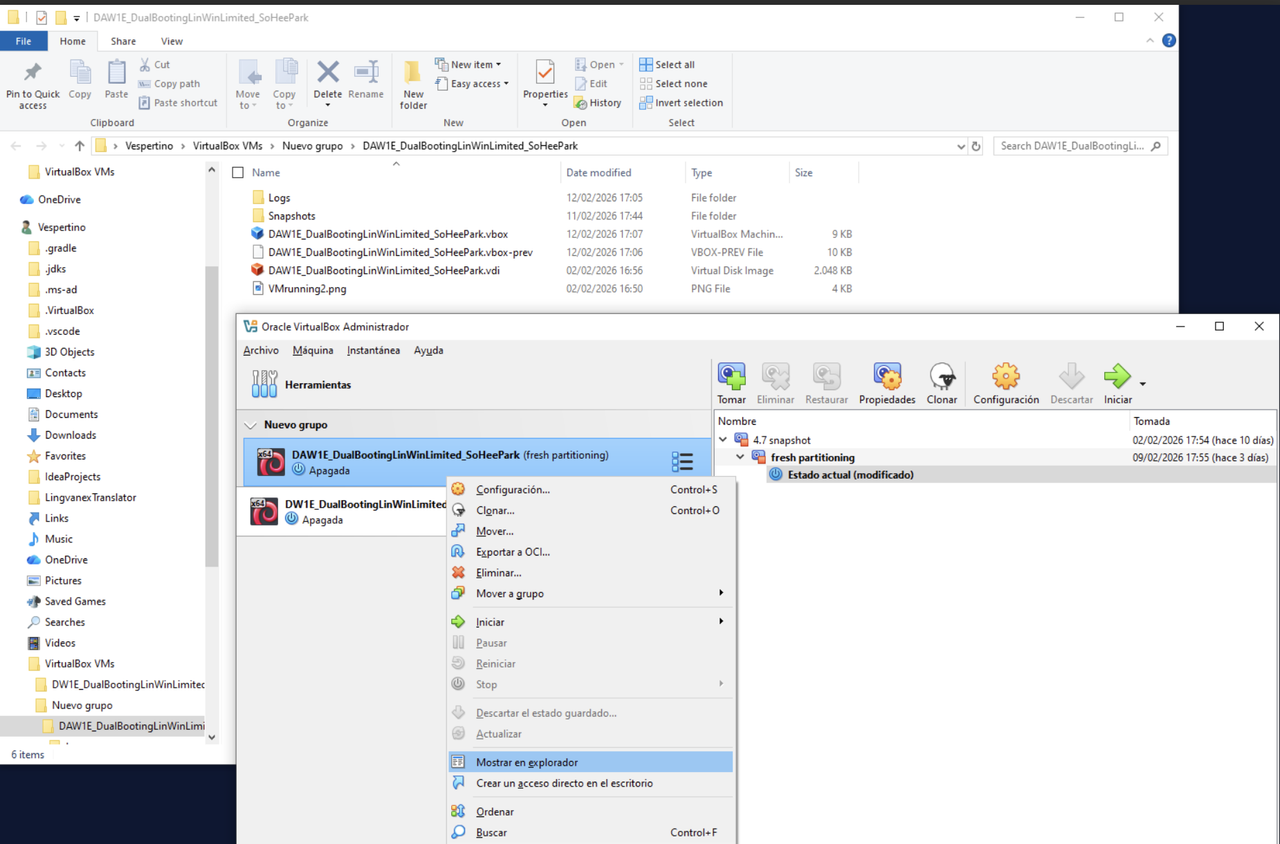
- ❓ Where can I see
.vboxand.vdifolders? scaffold>right click>show in explorer
.vdiof2 megasis always the min size of a dynamic vdi- when we create a VM, the vbox only contains RAM, cores, BIOS
- The
.isofile is an installer, it could be an OS, app to run
💡 Adding extra settings to the VM
Scaffold > Configuration ➡️ Window that gives lot of info about extra things in a VM:
- Every window here is specified with the option of menu a dot and the name of label
Menu.label - According to versions and characteristics of hardware for each one the label’s name are different.
- Every window here is specified with the option of menu a dot and the name of label
- There are two ways to see this
- 1️⃣ basic
- 2️⃣ expert: for technicians
📌 General label
✅ general.basic
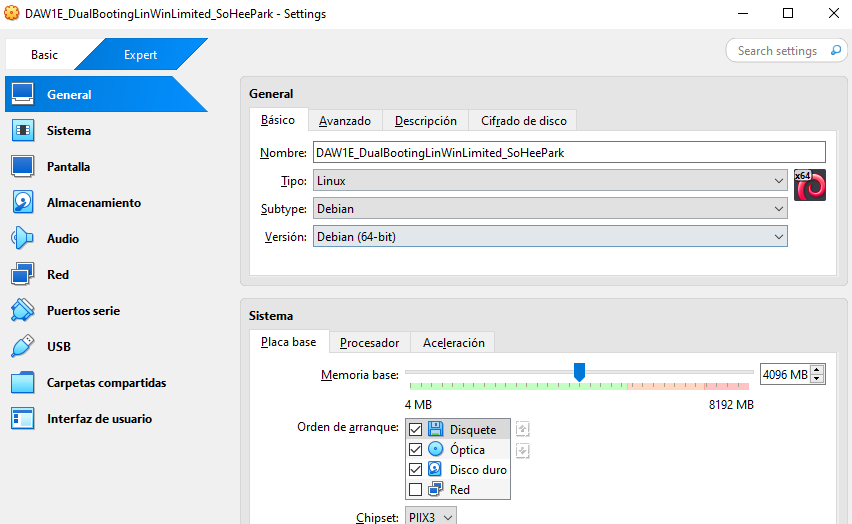
✔️ Name
- change name of VM for the last time
- ⚠️ chaning VM name later will unlink files of the VM once started!
✔️ Fields like type, subtype, version
- type, subtype, version can be changed here if they are not filled
- ⚠️ also last chance
- some
.isofiles do not fill these fields automatically - If we do not fill it, the VM will have mistakes when we start
- bc the specification of the
isofiles do not match
1
2
3
👀 An iso file with type windows, subtype 10
without the field version filled,
the system will filled this by default with the host arch settings.
✅ general.avanzado

✔️ Spapshot folder, carpeta de instaneas
- folder where the recovery points are saved
- recovery point: when we want to go back
- ⚠️ If we change this manually the snapshots could get unlinked, don’t do it.
- This is a subfolder in the VM folder
✔️ Clipboard, Portapapeles
- portion of the RAM for copying and pasting data
✔️ Shared functionally
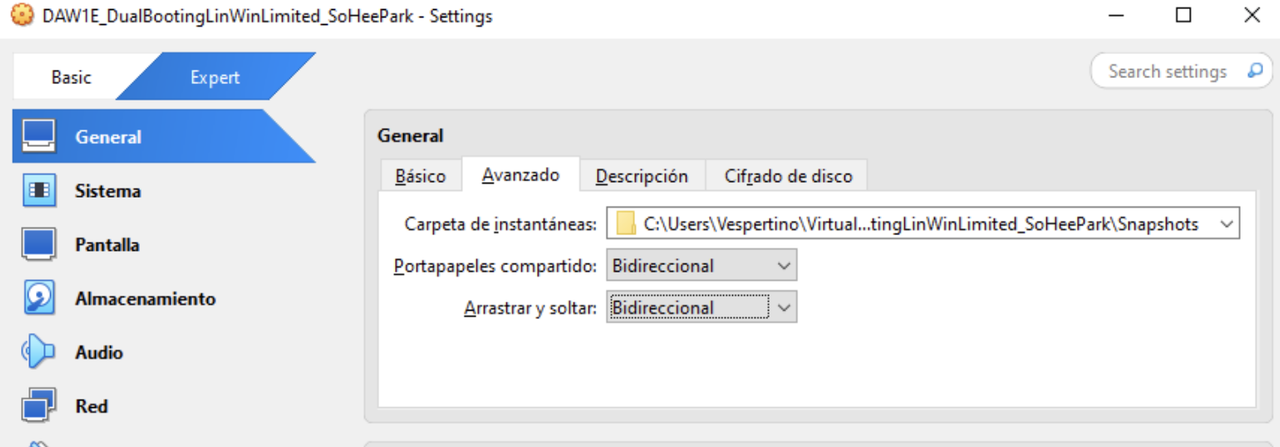
- for copy and paste data from host to guest
- importatnt for sharing information trough machines
- recommended to set it in bidireccional (copy & paste)
✔️ Drag ‘n drop
- Arrastrar y soltar
- Is not copying, is moving and pasting, must set to bidireccional
- This two functionallities are not activated until you add an extra package for security reasons
- GUEST ADDITIONS
1
2
3
4
5
6
7
8
9
10
11
12
13
⭐️ Guest Additions ⭐️
GUEST ADDITIONS complementos del invitado
- installed manually,
- needed for bidireccionality
- it cannot be installed until there is at least one OS in my VM
- For each OS is a different guest additions package

- In VM guests changes every time we add a VM
- In the VM in the aula the guest is GParted
- as GParted is not an OS we don’t installed guest additions (they are
only for OS)
- after we install Windows it will be my host
- then Lin on top of Windows and it will be the host.
✅ general.description
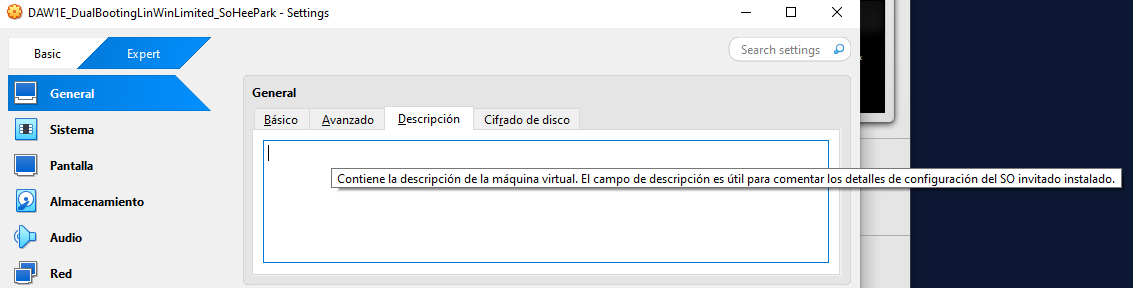
- Mandatory when we deploy (desplegar) our VM
- high level description of a virtual machine
- it says thoroughly what the vm says
1
2
3
4
VM over dynamic 100GB virtual disk created internally in host for dual
booting Linux and Windows on a hardware limited computer adding
tunnelling, distrohopping and making sure that both OS systems boot
independently no matter future changes.
✅ general.disk encryption
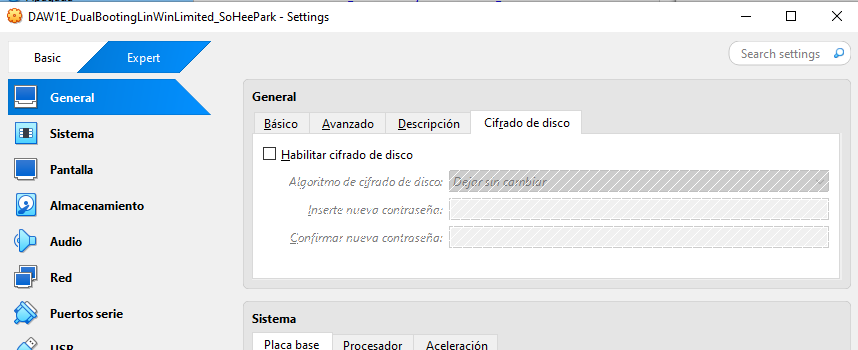
- setting for transparent encryption
- encrypting the
.vdiwith a key in my unit 0 of the real disk - or in the TPM(
.vdidoes not have a unit 0) .vdidoes not have specific booting if the real disk boots- it should be activated when we have private information(👀 passwords)
👀 the HR of a company should be encrypted or ethic hackers
- Do not enable unless is needed, encryption overloads the VM
- Remember that hashing which is the same as encryption, modifyes totally the data even with a little change
1
2
3
4
⭐️ ETHICAL HAKING
Hacking with a good purpose.
Whe we design hacking,
the VM should be ecrypted to avoid infections into the real machines
💡 Enable hardware watch(clock)
- Enable hardware watch(clock)
- you are getting the real machine data and time
- and you are giving that to the VM
- purpose: both VM and RM are syncrhonized
- when would you not want to synchornize the VM with the RM
- when you want to make a worm and play around
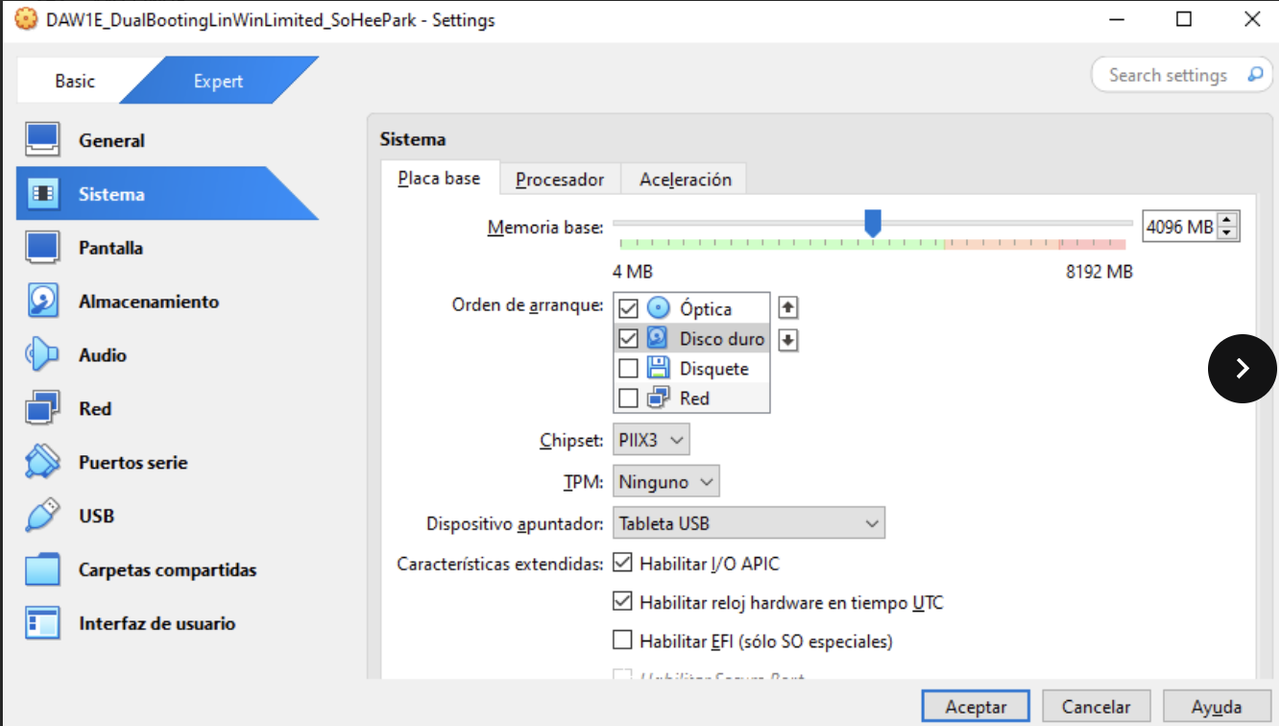
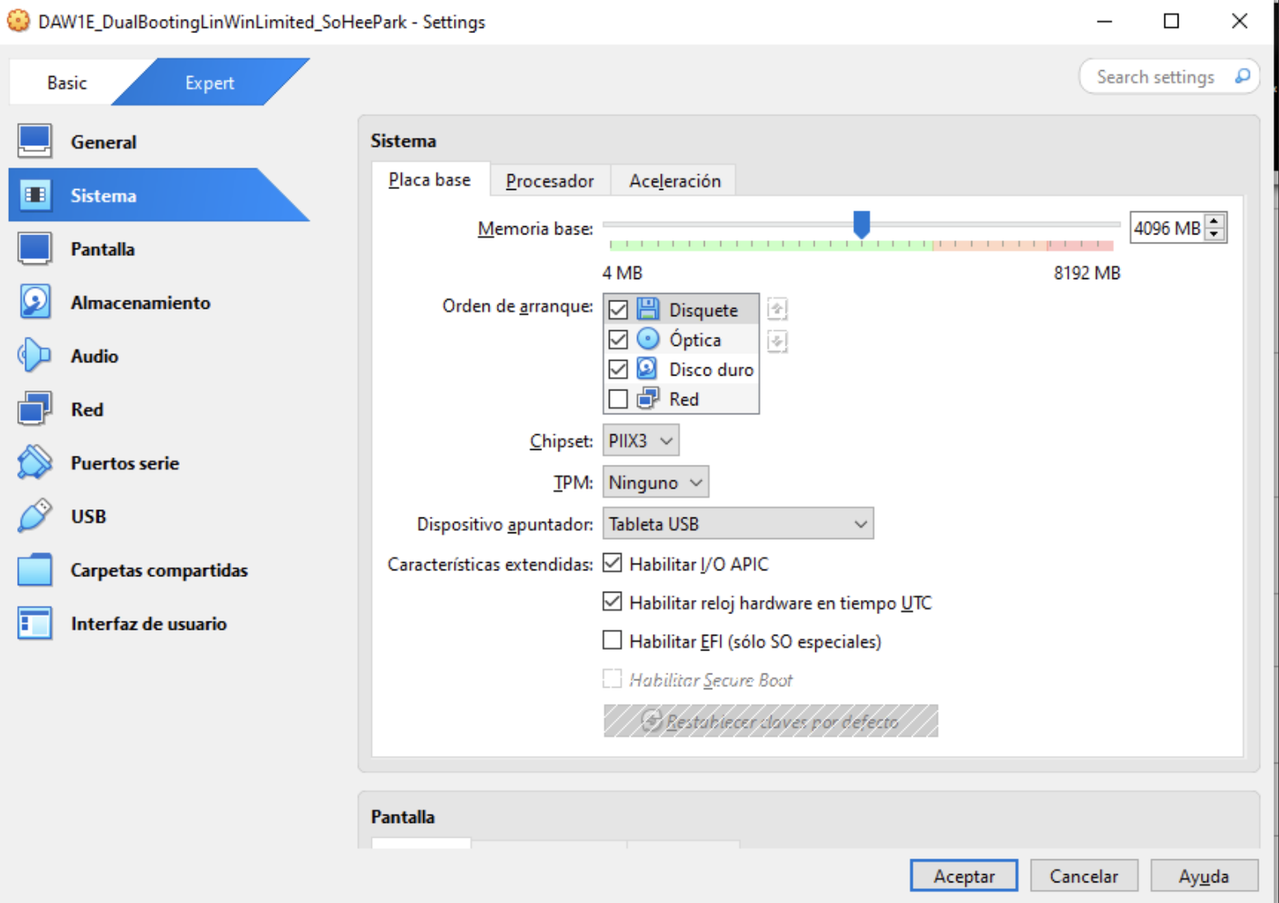
📌 System label
✅ System.motherboard
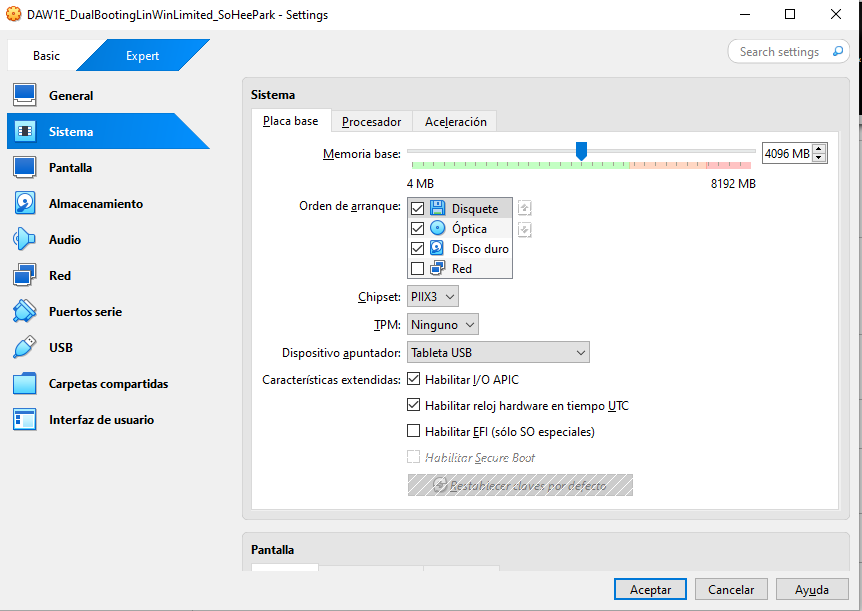
✔️ Memoria base
- change the size of RAM given to the VM
1
2
3
4
5
👀 If we have a windows 10 32bits
 .iso and the RAM is should be 4096MB (4096MB = 4GB),
⚠️ if bigger than 4GB, this system will not boot
so set it down to 4000 not to the limit.
sometimes more is less
✔️ Boot order
- same as boot sequence (which device will boot: HD or USB bootable)
remember this is not the same as bootstrap loader(which OS boots= GRUB)
- there are four options(although first two are mainly used)
- 1️⃣ Optical CD:
isothis is first, this means: boot with.isoand forget what is in the harddisk - 2️⃣ Hard disk:
.vdithis is first, this means: boot with harddisk and forget what it is in theiso - 3️⃣ untick diskett, it is not used
correct order and options ticked
- when the
.vdiis created, it is empty - in Virtualization, if the
.vdiis first, the machine will not boot - this is an order that excludes, will show the error
No Bootable media found
1
2
3
4
5
6
7
👀 If we have windows and we want to install Linux,
which option should I use for the boot order,
and what iso should I exclude?

- Optical = iso
- Harddisk
- if we do it backwards, linux will never be read
- 4️⃣ network installation: sometimes network installation is also possible
✔️ Chipset
- Dual chips: northbridge and southbridge
- NB helps with important things
🛠️ RAM, Graphics FSB
- SB helps with not so important things big chip
🛠️ USBs, microphones, speakers(external connection)
- These days, the northbridge goes inside the CPU and lost functionalities
- the SB now called
PCHdoes more things getting hotter - Here we have to decide if we want traditional system or modern PCH, remember it is not what I have, it is what I want.
- If I want standard chipset, select
PIIX3 - If I want powerful chipset, select
ICH9

PIIX3: NB and SB called like this due to the first computer that has this structure- 🛠️ choose PIIX3 when the vm doesn’t need much power in graphics
- 🛠️ simple OS
ICH9: PCH modern structure- 🛠️ strong OS
1
2
3
4
5
6
7
👀
GParted. iso → PIIX3
Mac OS→ ICH9
iOS → ICH9
Win32b → PIIX3
Win ≥ Vista 64b → ICH9
Linux ? should be flexible
- ⚠️ Sometimes chipset is not available
- because of backwards compatibility,
which means if a
host has ICH9and theVM will use ICH9it will work with iso files, this is valid but not perfect.Normally using
ICH9needs more energyTPM means if you want to simulate TPM for Windows 11 OS option v2
- Some selections are flexible and others are strict,
- Whenever you tick something that is strict
- it will appear an option
Invalid settings detected - example disk encryption is strict only tick when needed
- Selecting the TPM when we don’t need it means overloading the CPU in my computer

✔️ Pointing device mouse
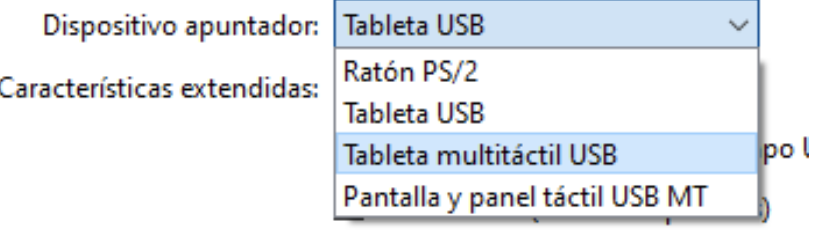
PS2is you want the vm mouse to behave as the standard mouseblinks at low speed
Tablet USB: means new USB- high speed
- To use the tablet usb, the USB should be readable for the vm so it will only be valid when we have the extension pack
- Many companies reject the extension pack
- they don’t want you to do the things your way.
- in this case, if we don’t have the extension pack, we have to use PS2 option
- conclusion: choose the most modern possible pointing device, making sure that is valid add ss of extension pack and tablet
✔️ I/O APIC
Input/Output Advanced Programable Interrupt Controller
- Peripherals = input output
- Interruption = error
💡 8 shape: If there is an interruption, we go to the verctors table, it sends us down to the service routine, solved by execution of a command and I come back to where I was before
- If we activate this option we are asking for help to the peripherals
- we should do it when :
- 1️⃣ More than 1 virtual core: mandatory, must tick on
I/O APIC - bc you have two bosses(cores) interrupting
- if we untick the
invalid settings detectedwill appear 2️⃣ app or OS has 64b optional
- after you start the OS, you will not be able to tick/untick the
I/O APIC - ⚠️ so becareful
1
2
3
4
5
Virtual Box 7 chooses I/O APIC auttomatically, v5 doesn’t.

❓ Why companies with v5 stayed this way?
- Upgrading means leaving traces from older versions
- in companies these traces must be cleaned computer by computer and they can make the scaffolds dissapear
✔️ EFI
- ⚠️ last opportunity to change this
- OS specials: this is telling you this is needed in a
OS Win ≥ grater Vista 64Gb - If we tick this we have the possibility of activating the secure boot
- Linux does not accept secure boot
✅ system.procesador
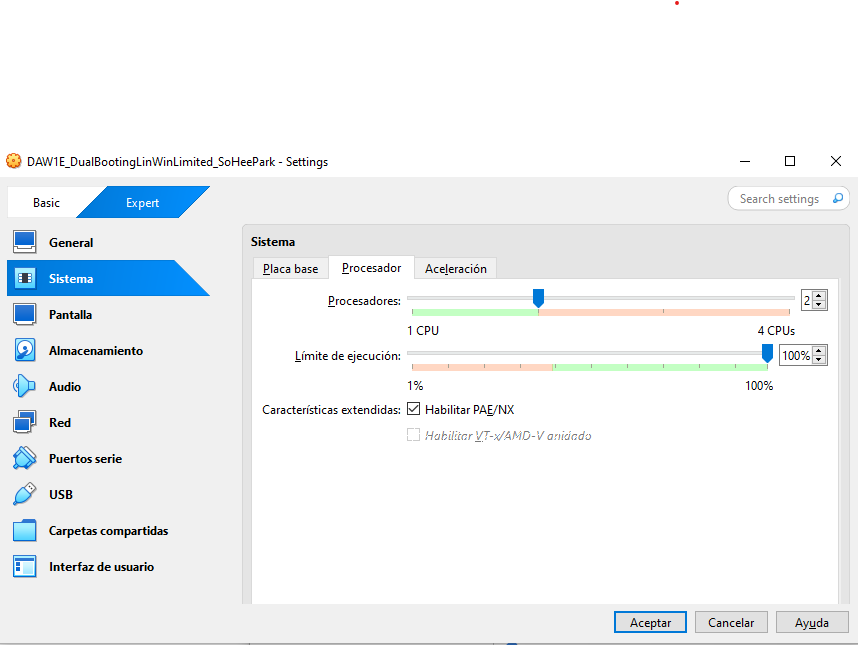
✔️ Cores
- ⚠️ last chance to change core number
✔️ Execution Cap, Limite de ejecucion
- 1️⃣ If the execution is 100%, there is no limit on the VM
- obviously, there will always be RAM, cores limit
but other than those, there is no other limit
- 2️⃣ If the execution is lower than 100%, weakens the VM
- you do it to weaken the VM
- and give the power to the RM
- do it when the VM is so demanding, it is being too strong
- the VM is eating too much of your RM
- and the RM will run better
Setting the Exec limit down means weakening the VM and giving better performance or extra power to the real machine.
- 3️⃣ If the execution is 0%
- you are making the VM stop/freeze
- which means 🟰 stopping
- it does not mean shutting down the VM ❌
- 🛠️ to protect your VM from VM malware
- 💡 VM malware: a VM that enters your computer without your permission, and starts running
- if you have a VM malware, you set the limitation cap of all the VMs to 0%
- then, go one by one and for only the VMs you know and are official, set it back to 100%
✔️ PAE/NX
- 1️⃣ PAE
- P: Physial
- A: Address ➡️ RAM
- E: extension
- ➡️ RAM Extension
- ➡️ SWAP
- use harddisk help
1
2
3
if RAM of the VM < 4GB then SWAP = RAM*2
if RAM of the VM = 4GB then SWAP = RAM
if RAM of the VM > 4GB then SWAP = RAM/2
- 💡 Note: Tick PAE, if RAM <= 4 GB
- Do not tick PAE only if RAM > 4GB
Also try to save some SWAP, save some harddisk, if you do not need
- ❓ Why not tick PAE in every condition?
bc PAE is taking space from your SWAP, your HD
- 2️⃣ NX: Non execute
- Flag that you exable for suspicious processes
- 👀 suspicious processes: process that tries to enter the OS in RAM
- then you enable NX flag for that processes
- if the antivirus sees a process with the NX flag,
- antivirus will capture it and swap out three generations from the process from the RAM
- in order to see the generations of the process,
we need to do a query of the processes table in OS in RAM
❓ Why is PAE joined to NX?
- bc I need to capture the suspicious process and make queries
- and these queries are overusing the RAM
- and you are increasing the waiting time for the good processes
- so you use the help of SWAP
so that standard processes do not have to wait so much
- 💡 Note: not all process needs protection in a computer
- 👀 pings can fail, but as it is repeated, it can fail as long as it is repeated
✅ system.aceleration
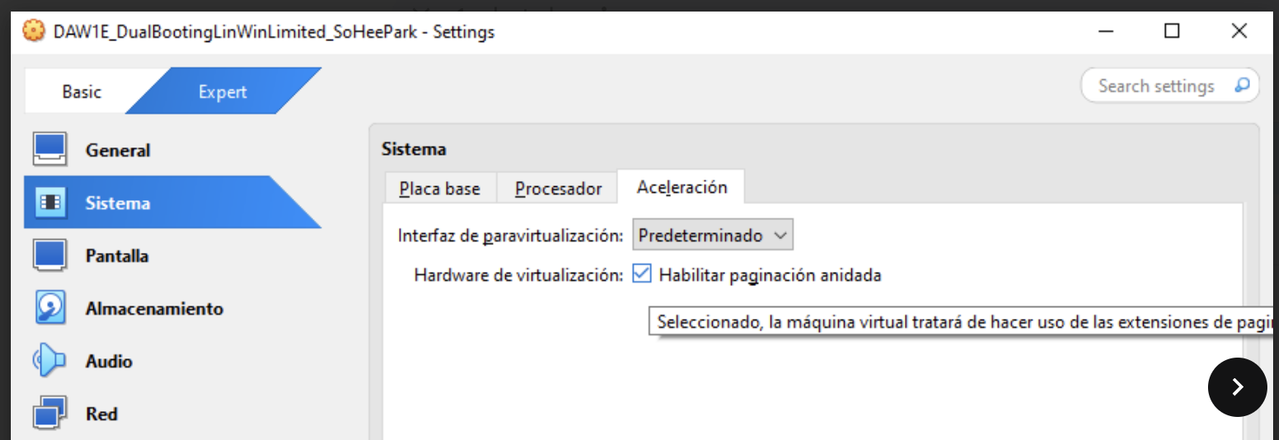
- the RAM always gives more priority to the RM processes
- VM processes have worse priority
- if you activate accerleration,
you balance all processes of both RM and VM
- tick means: balancing
📌 Pantalla
✅ Pantalla.pantalla

✔️ memoria de video
- RAM of your graphics card
- modern graphics card have their own RAM for speed purposes
- memoria de video(Grpahic card) does DMA, they have their own RAM ⭕️
- it does not do PIO anymore ❌
1
2
PIO: doing the 8 in the RAM
DMA: Direct Memory Access, having your own RAM
- If I have a graphics card in my RM that has a RAM,
- how much of the total RAM of grphics card should I give to the RAM?
- maximum half of the RAM of grphics card to the VM
✔️ numero de monitores
- several screens in your VM
- leave it as default
- when we tick this option, we need to choose how much percentage we want for scallatoin through monitors
✔️ Factor de escalado
- how to split VM to several monitos
- scale: give 40% of VM to screen 1, give 60% of VM to screen 2…
✔️ Graphic controller
- controlador grafico
- resolution you are giving to the screen of the VM
should be specific for each
.iso- 💡 Two types of resolution
- 1️⃣
VGA: low resolution, width and height lower than 800px - 2️⃣
Super VGA: high resolution, width and height more than 1000px we need
SVGAfor VM when the VM needs high resolution- 🛠️ high resolution: when
GUIis important - we always need to check the specs of the
.iso - if we have a VM buttons that disappears,
it is bc you should have given
SVGA, but you did NOT! 😱- ❓ Why not give
SVGAalways? - do not give a
SVGAto an application that wantsVGA - it can make an
.isonot to work, bc you are demanding too much resolution
✔️ Two types of SVGA
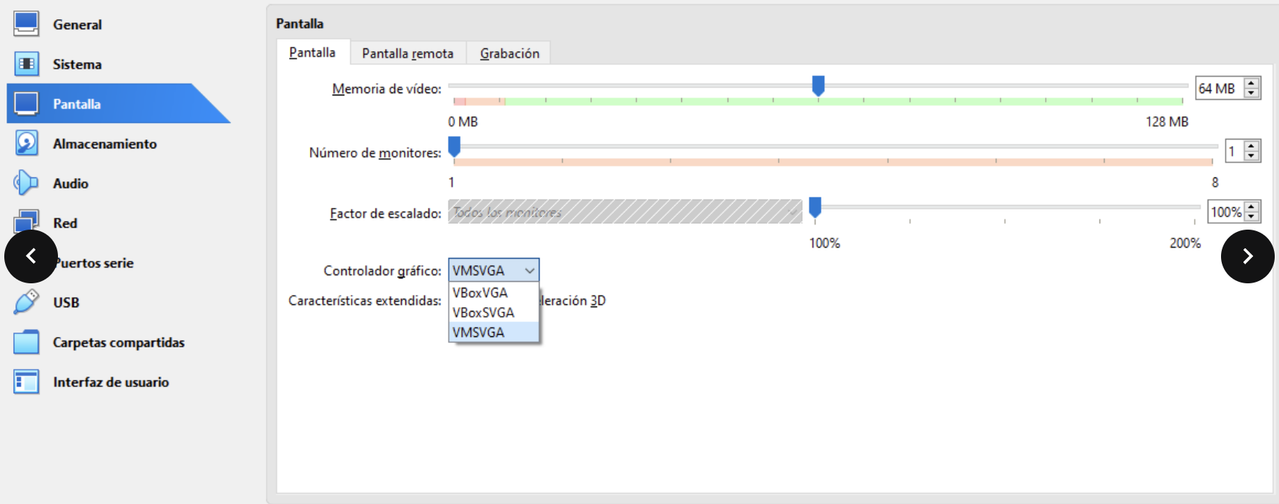
- 1️⃣
VMSVGA: the perfect controller for that specific.iso 2️⃣
VBoxSVGA: standard controller offered by virtual box, with minimum requirements- if the
.isoneedsVMSVGA, do not giveVBoxSVGA - some
.isodo not haveVMSVGA, so you need to chooseVBoxSVGA
✔️ Acceleration 3D
- tick only if the specifications of the
.isodemands on its specs - 🛠️ for videos, movements
- do not tick by default
✅ pantalla.screen remote
- executing applicationg using the network
✅ pantalla.Grabacion
- used for recording the VM with the camara
- for this, the extension pack is necessary
- only will be possible when the extension pack is active
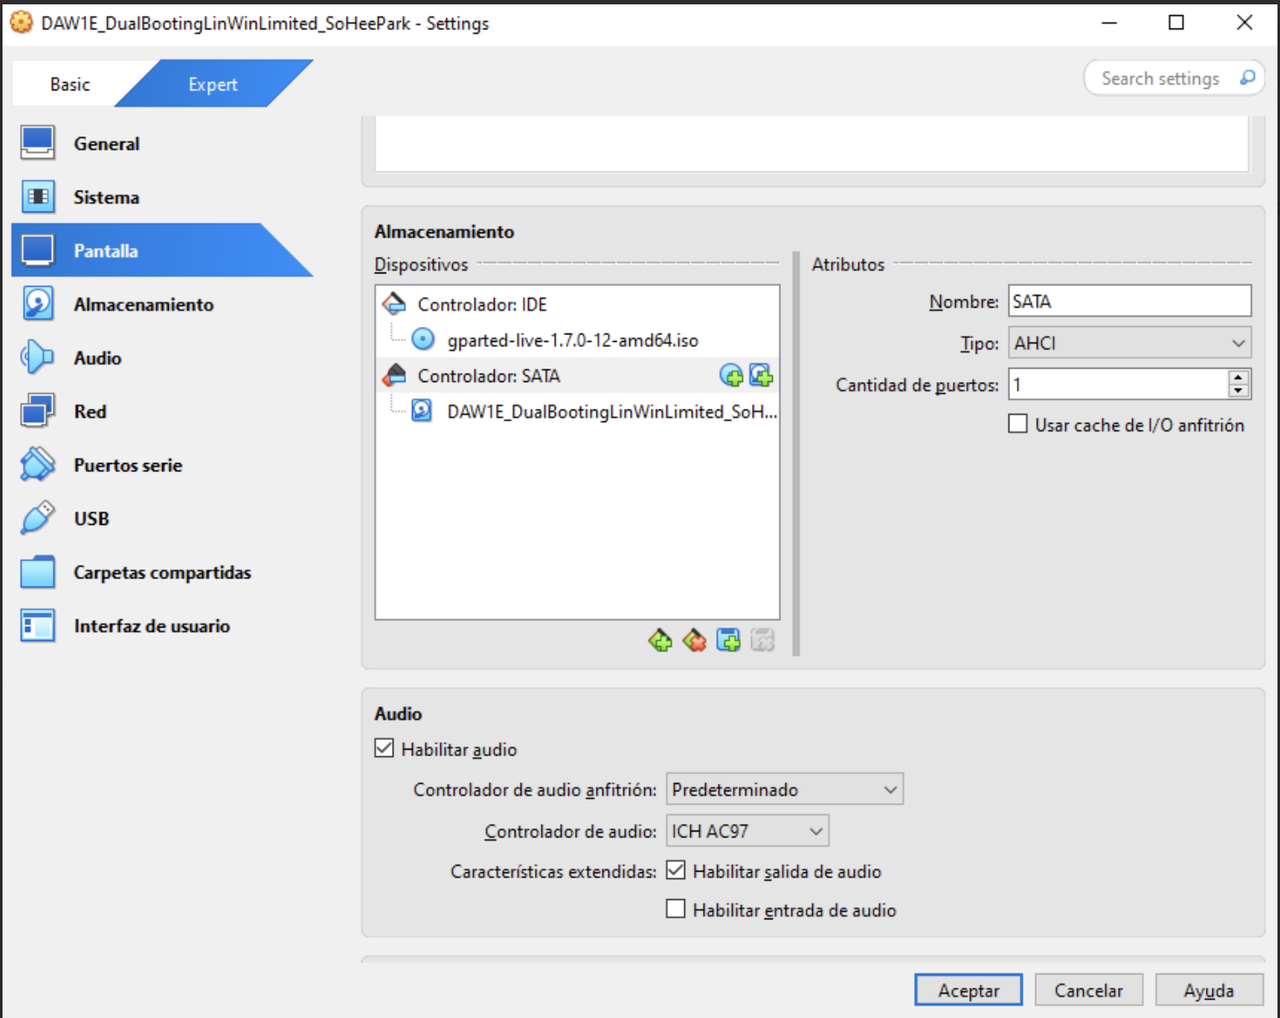
📌 Alacanamiento
- not booting order
- booting order was in
systema.placabase - first, optica, then HD
✅ Alacanamiento
- but in almacemiento is organizing the files
- ideally, there should be two zones in this screen
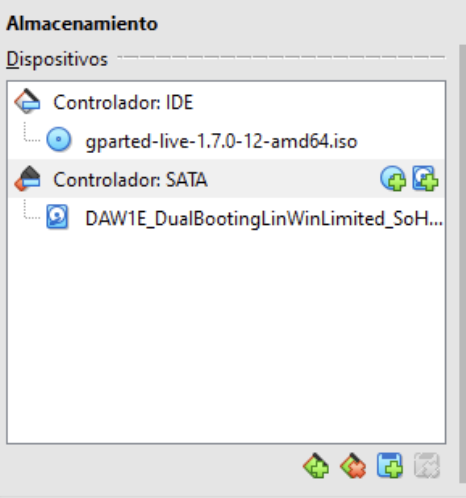
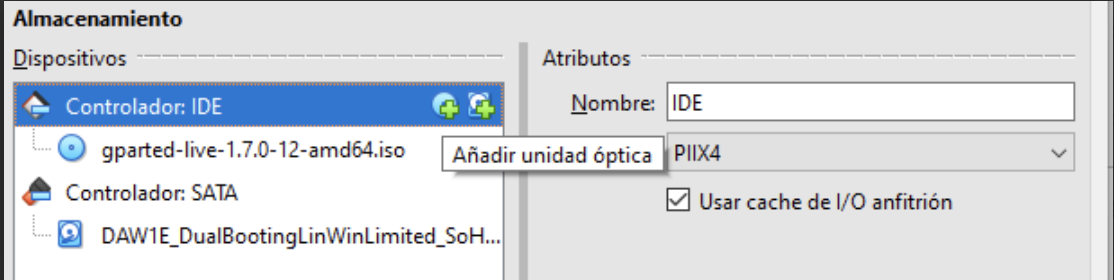
1️⃣ zone 1: IDE Controller
- IDE is PATA
- 🛠️ PATA is for CDs/DVD
1
2
3
4
PATA
- Parallel, the bits travel in parallel, in groups
- (the wide gray wire)
- they were used for CD/DVD
- 🟰 nowadays, CDs will be the equivalent to
.isofiles, .isofiles are for installing applications- 👉🏻 It is mandatory that the
.isofile of the VM - must be under the IDE zone of the storage window
2️⃣ zone 2: SATA/AHCI controller
- better for interferrences
- and the harddisks were connected to the SATA
🛠️ SATA is for Harddisk
- 🟰 in VM, the
.vdi(virtual disk)is equivalent to the Harddisk in VM - 👉🏻 It is mandatory that the
vdifile is inside the SATA zone
1
2
3
⭐️ Conclusion
iso file inside IDE controller
vdi inside SATA controller
💡 ITIL standard
Information Technology Infrastructure Language
standard of working, 👀file names
- And if your VM has this structure,
- (
isofile inside IDE controller,vdiinside SATA controller) - you are fullfilling the ITIL standard
❓ What happens if I do not fulfill the ITIL standards?
- the machine will work
- but it will not be organized
- you should transform into ITIL
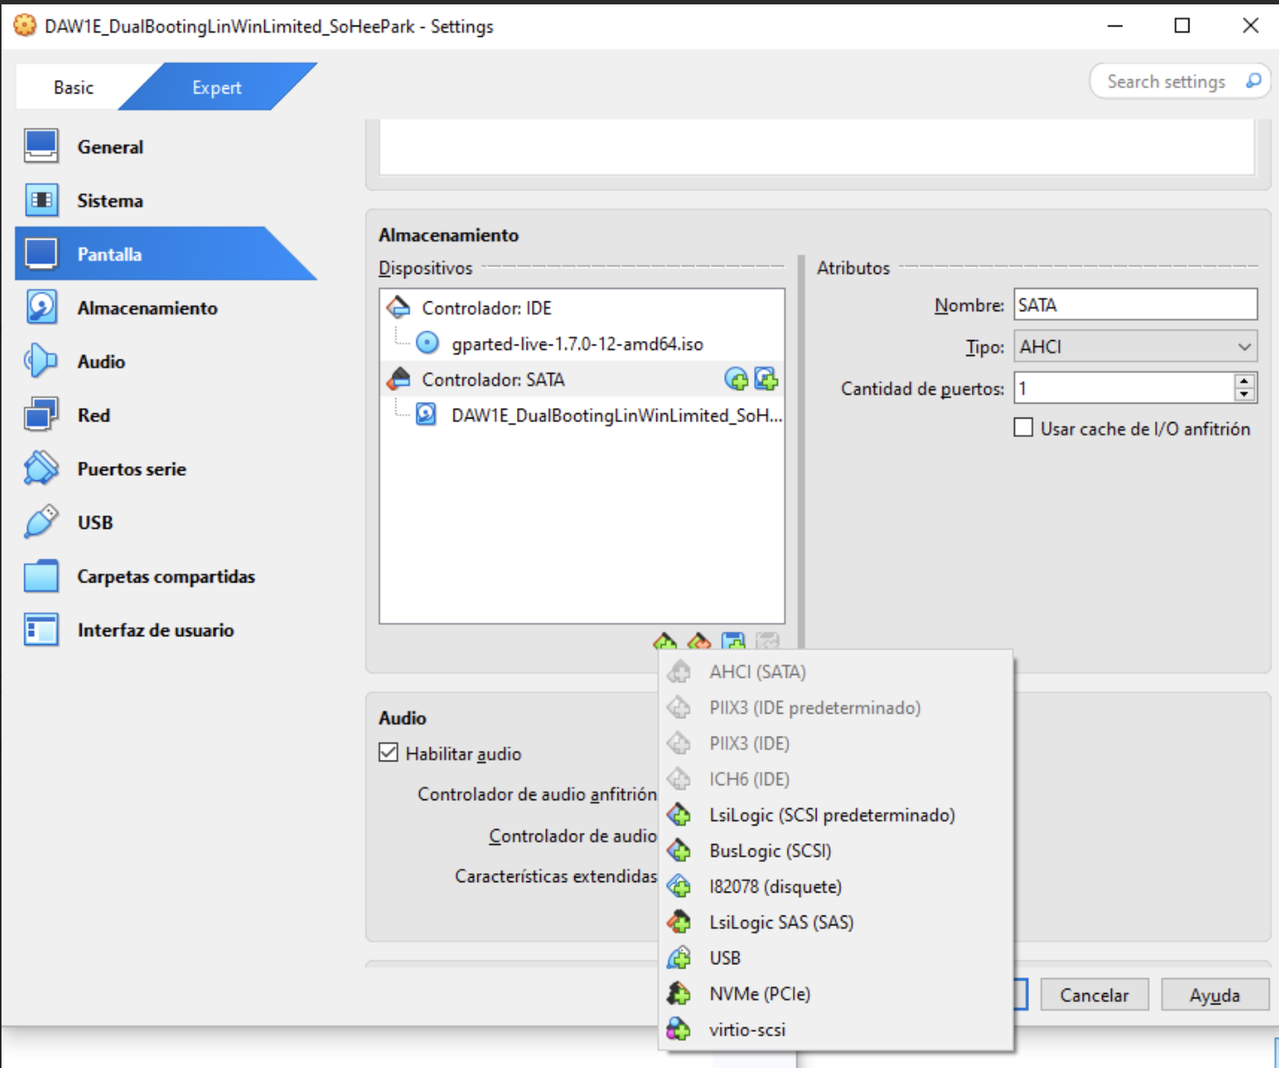
💡 How to make your almacenamiento ITIL
- imagine you have both
isoandvdiinside the SATA you do not have PATA
- 1️⃣ Create the controller that is missing
- click on the
green plusthat you have on the bottom, the mostleft button - and add a new controller
añadir controlador - there are several versions of the controller
- choose the default
- 👀 create PATA
- 2️⃣ Eliminate the file that is incorrectly located
- 👀 if you have
isoin the SATA, delete theisofrom the SATA use the
red crossnext to thegreen plus- 3️⃣ Then add the eliminated file to the correct controller
- (a) click on the controller that you want to add the file
- (b) choose if you want to add the
iso(round) or thevdi(square)
- Note: If VirtualBox does not let you add one of the controllers
- it means your hardware, like your macbook, does not allow
📌 Audio
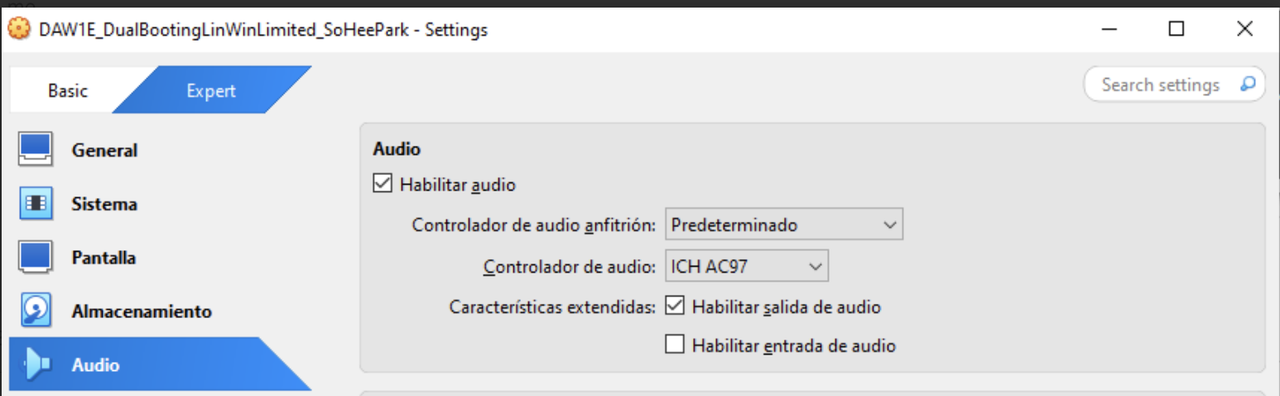
- used for enabling/disabling sound in VM
- 🛠️ audio is used to indicate/correct the installation process signals
- to check if installation process is going well
📌 Network

- to connect your VM to the network
- see chapter 4.5
📌 Serial port/puertos serie
- old fasioned
- to create a vintage VM
- to use joystick in serial port
📌 USBs
- used for using USBs in your VM
- should enable
- and choose the speed
- USB letter
A, B, Cmeans the shape of the USB and the number means the speed of the USB
- If you want to use a
speed >= 2, you need the packageextension pack
💡 USBs have a problem in VM
- USB is in the real machine
- and if used by VM
then the USB cannot be used by the RM
- 👉🏻 USB cannot be used simultaneously used by the RM and the VM!
- RM and VM fight for the USB
only one machine can have it
- so very problematic for installing a file with a USB
- 💊 Control the USB as a shared folder
- so USB will become a shared folder
💡 How to make USB into a shrared folder
- …continued in
shared folders
📌 Shared folder
- USB can be transformed into a shared folder
- not a device anymore!
- 1️⃣ Insert USB
- 2️⃣ Click on the green plus
- add shared folder
- 3️⃣ Select your USB root
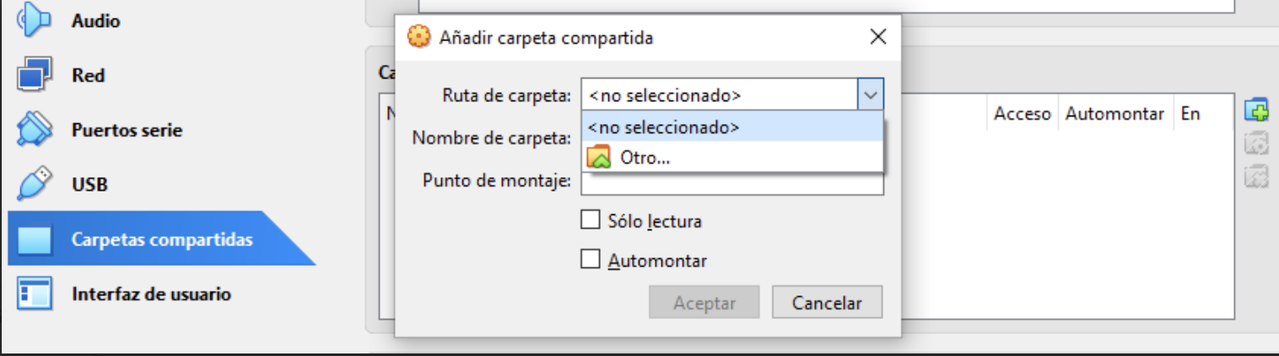
ruta de carpeta > select originof the USB- select the letter of the USB
- 4️⃣ Decide if you want the USB just for reading
- for us, let it both for reading and writing
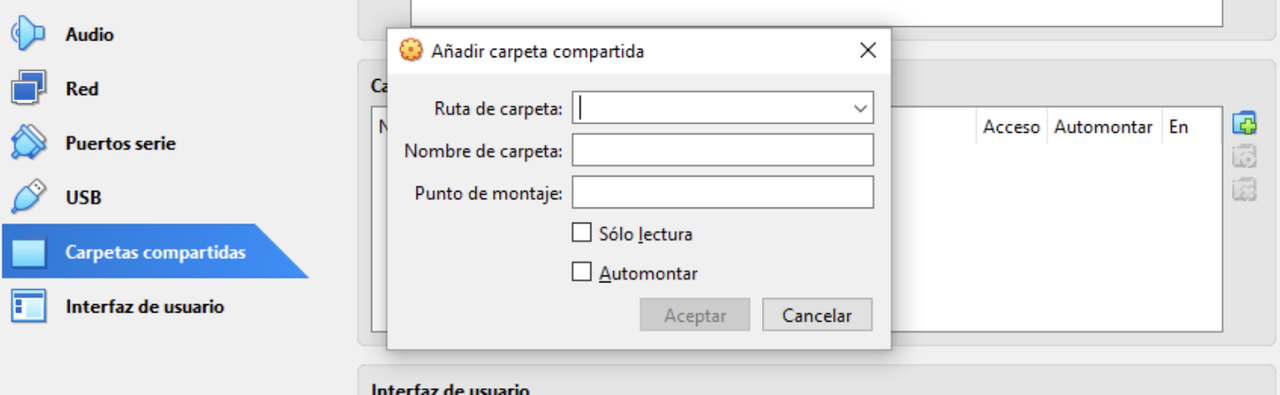
- 5️⃣ In windows, USB is read automatically
- But in Linux, USB is not read automatically
- Linux does not show the USB as soon as you insert it
- 👍🏻 Linux does this for security reasons
- you have to mount the USB
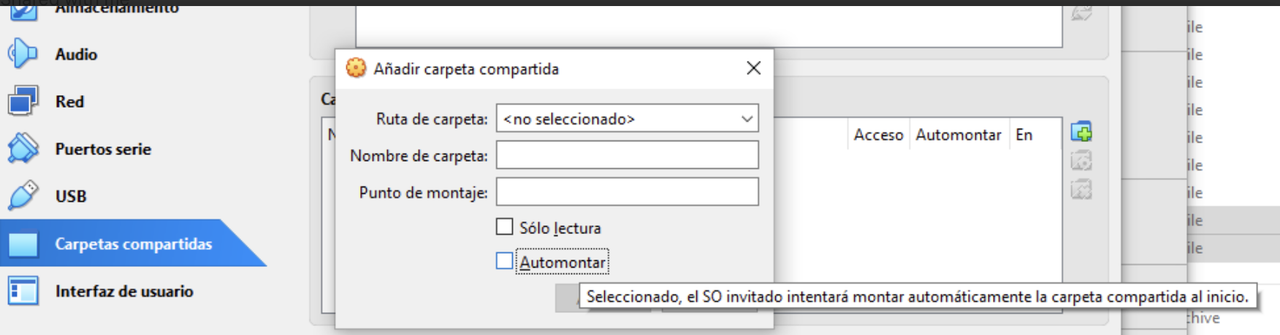
- 6️⃣ Click on set mount automatically,
Automontar - 👉🏻 Now this USB is a shared folder,
- being reachable both by VM and RM
- 7️⃣ We need to add extra security
- as the USB is reachable by both machines, we need more secuirty
- need an extra package
Guest Additions, GA - package installed after running the
.iso GAadds extra funcionality and security
⭐️ mount in Linux
- giving a name
- and activating it
⭐️ Guest Additions
- add extra security for shared folders
- need to add this package after the
iso - If you want to make your USBs you need to install
GA - 👀 functionalities such as: maximizing your window
📌 User interface
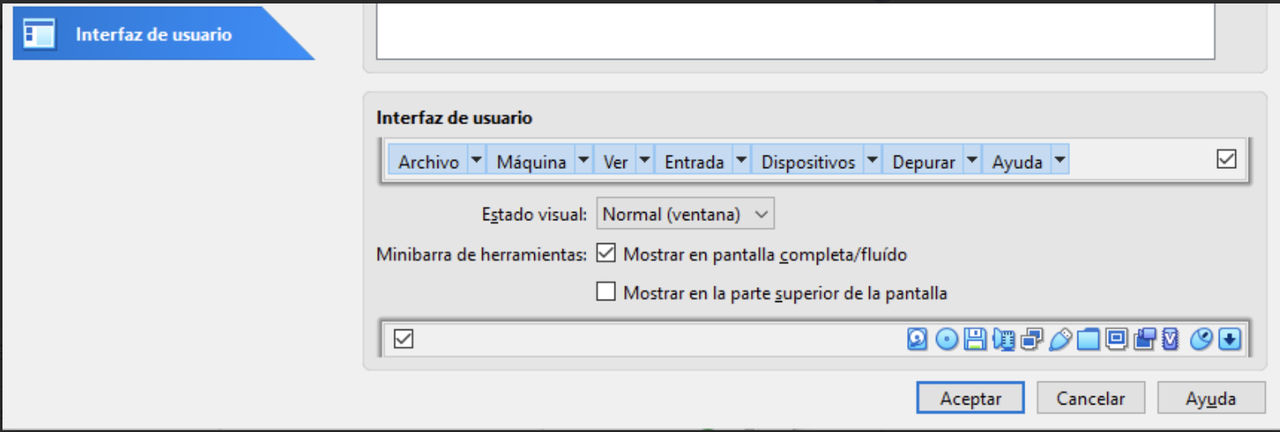
- Interfaz de usuario
- how your interface looks like
- But as tecnicians, do not touch it, as not everyone likes your style…
📌 Host Key
- tecla unfiltrion
very important extra setting
- key for giving the control to the host(RM)
- in case of loss
- sometimes, when we run the VM,
- the VM can be in control
- control of keyboard, mouse…
- so use
Host keyto get that control back to the RM
1
2
3
4
sometimes, the VM can capture the mouse
mouse will not be useable by the RM
💊 to solve this, use the host key
to get the control back to the RM
- by default, the host key is
Control key on the Right Control + ➡️❌press the
controlkey that is on the right side of the keyboard- If we do not have the
Control key on the Rightbc I have a laptop, - 💊 we should modify the host key
- this is a basic setting, so you must do it
💡 How to modify the host key
- 1️⃣ All the machines should be turned off
- 2️⃣ archivo(files) > preferences >
- 3️⃣ entrada > virtual machine
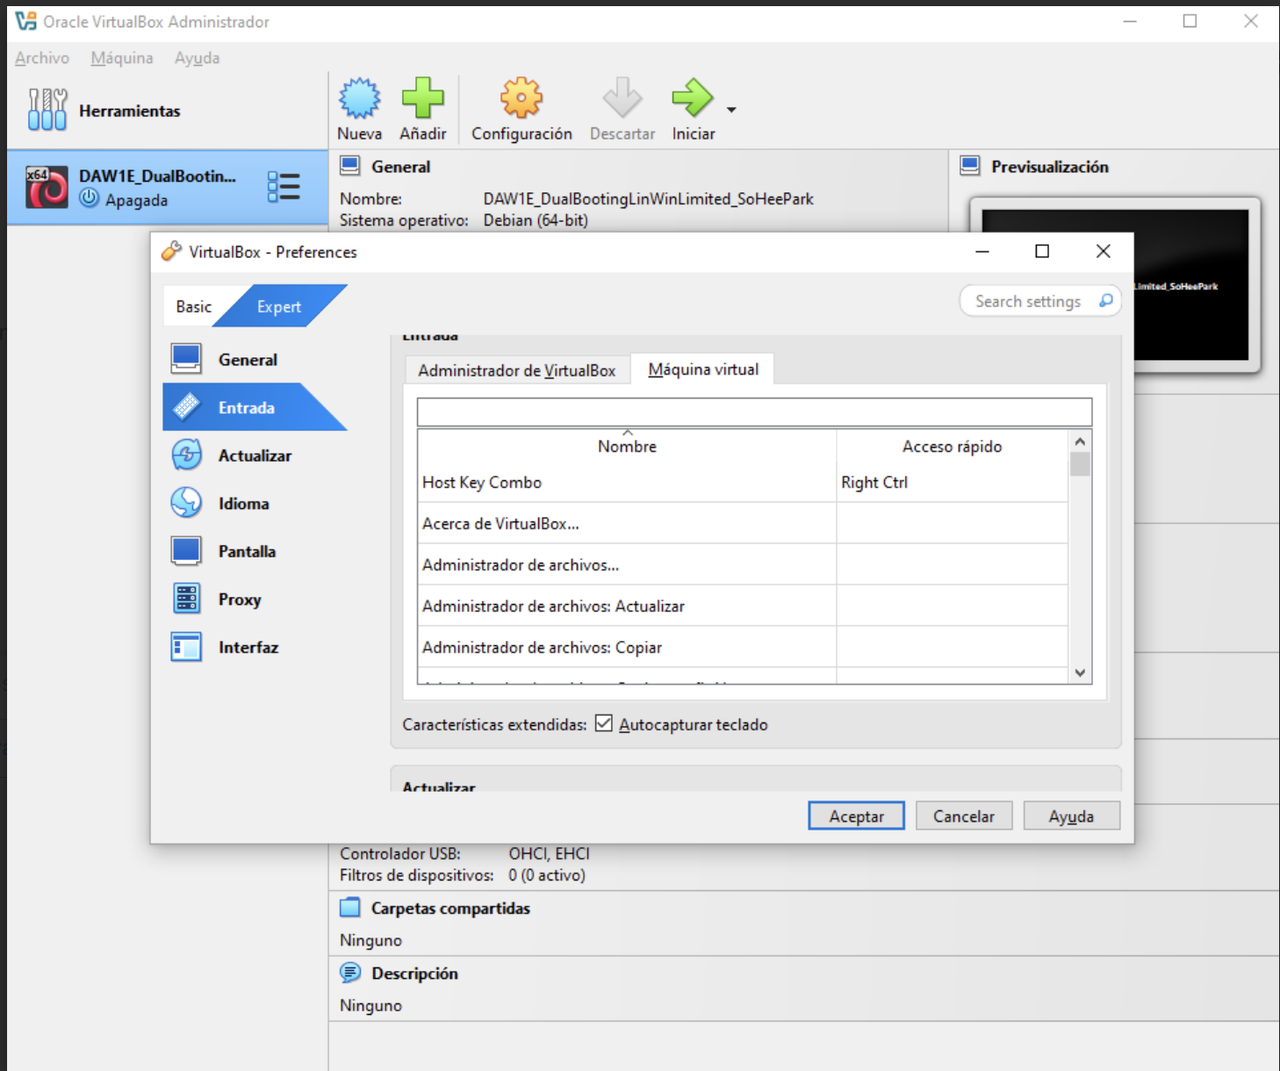
- 4️⃣ to change it, click on it and delete it
- Note: If it appears in black color, it is for security reasons
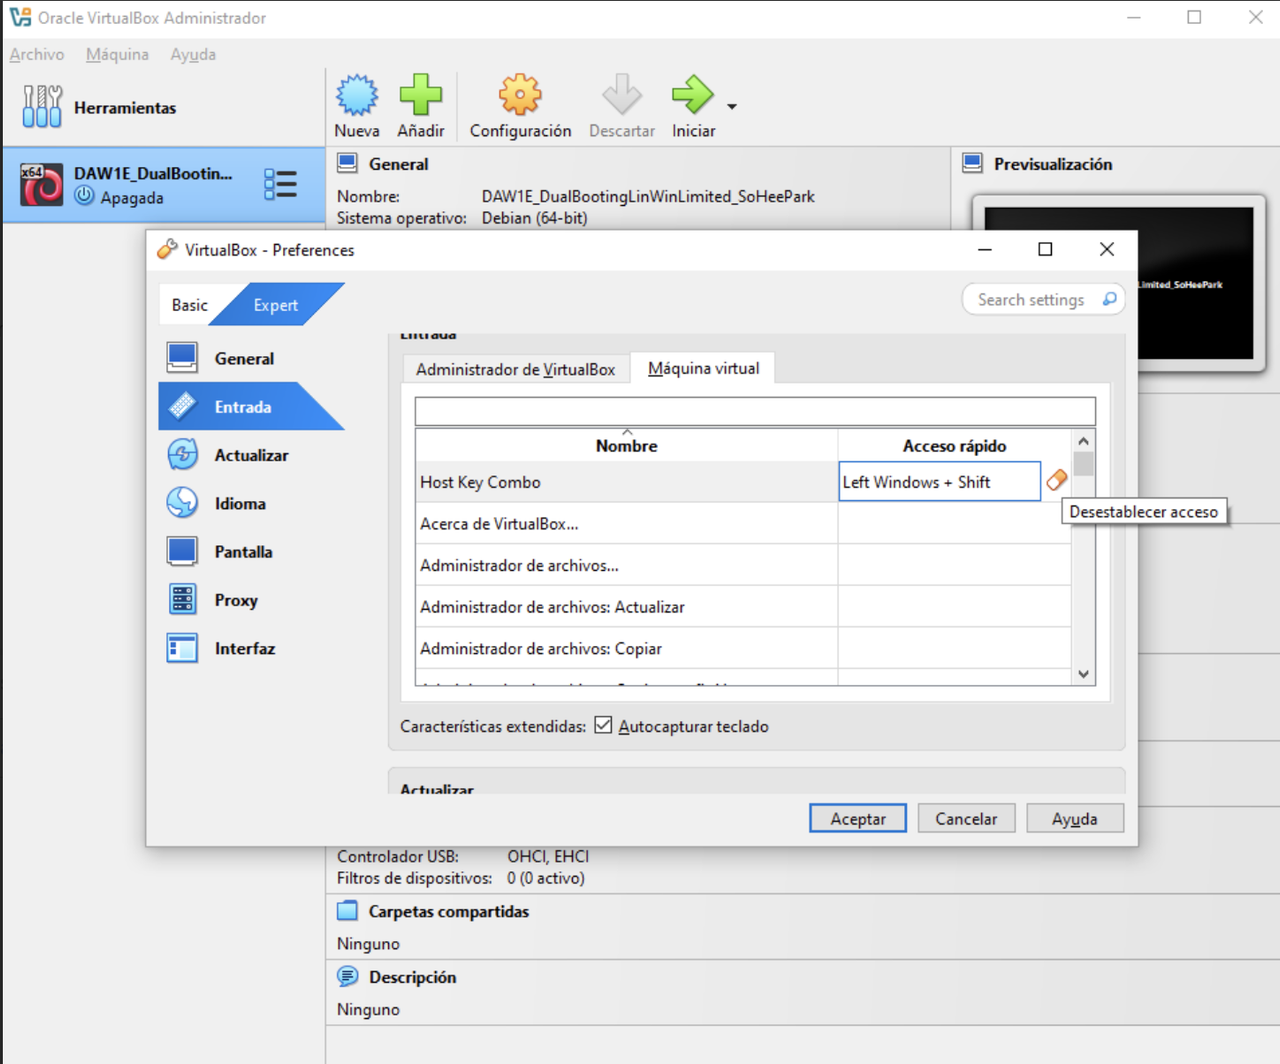
- 5️⃣ press once, on your keyboard on the key that you want to use as your host key
- Note: use a key that is not used so often, so that it is not pressed so often
💡 How to take screenshot in the VM
- In VM, the shortcut with the keyboard will change
there are three tecniques that always work
- 1️⃣
Windows + Mayus/Shift + s - 2️⃣ Use external application
- Herramientas recortes windows
- 3️⃣ Screenshot tool of VM
- for tecnique 3, the VM should be running
📌 How to close the VM when it is running
- When the VM is running
1️⃣ If there is an OS installed on the VM
- use the
OS switch offtechnique - follow the standard way of switching off the VM
- in windows:
start > switch off - ⚠️ If you are going to use this method,
- make sure to press on the VM machine button ⭕️ , not the RM button ❌
2️⃣ If there is no OS installed on the VM
- use the
Xof the VM - there will be three states
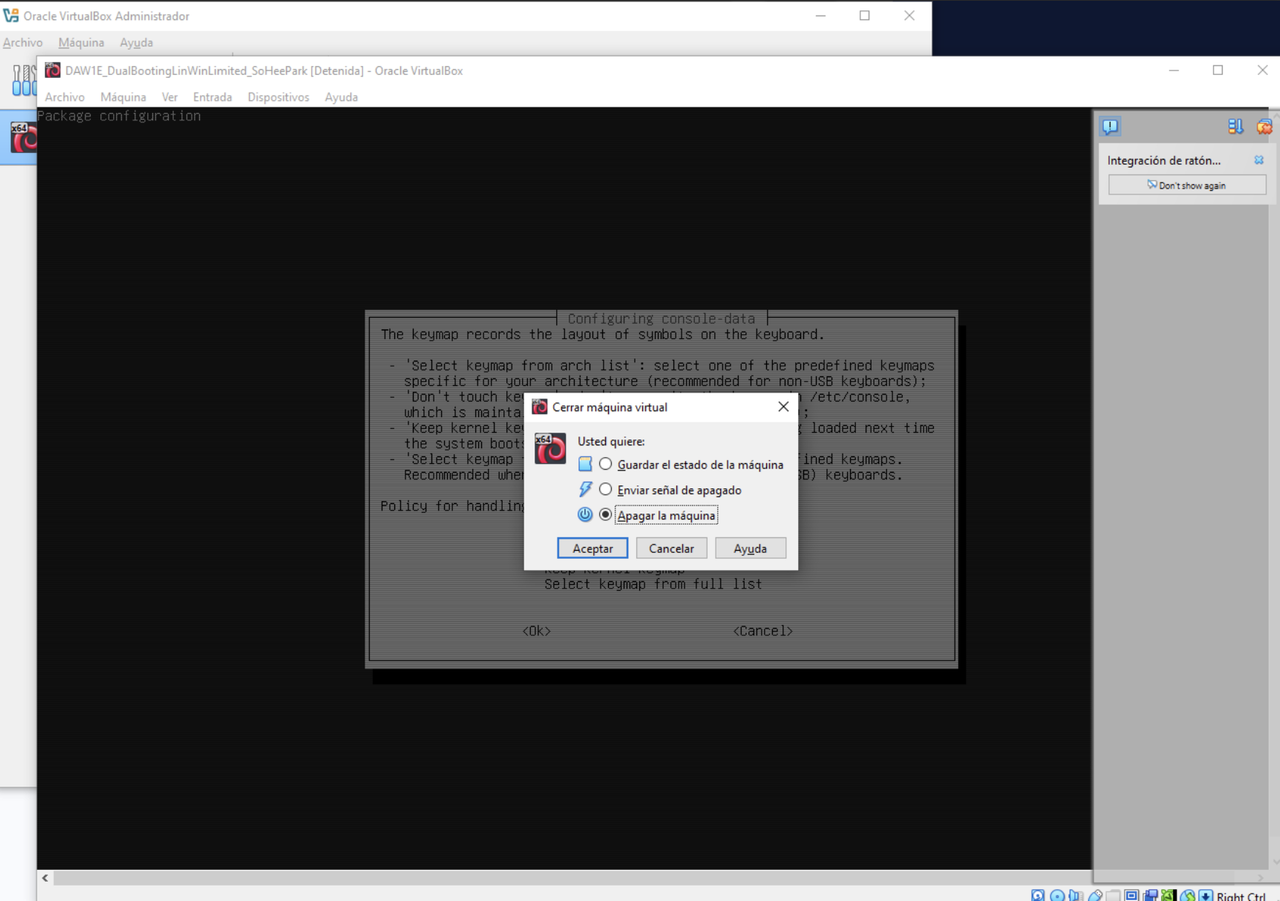
- 1️⃣ Save state
guardar el estado - hybernate, freeze the VM
- leave the VM for later
- ⭐️ hybernation means:
- save the information on the RAM(volatile)
- and save them on the Harddisk(involatile)
for later uses
- ⭐️ hybernation save state is saved in the
vbox vboxfile is specific for each RM- so if I have a VM in the USB in work computer and I bring the USB to my house
- and the USB opened in my house computer,
- the file will not be the same
- hybernation cannot be deployed/distributed to another computer
hybernation is local, for one computer
- 👎🏻 uses lots of harddisk space
🛠️ Only if we need to interrupt the VM for a long installation process
- 2️⃣ Send shutdown signal
enviar señal - this is switching off carefully, perfectly
- saving everything, extracting the USBs…
- 👎🏻 It extracts the
isofrom the VM - 🛠️ Use when installation is complete
when you do not need the
isoanymore- 3️⃣ Switch off
apagar - same as closing a computer by pulling the wire
- shutting down a computer in a very abrupt way
- 👎🏻 many problems, the VM will not be able to save the files, the VM will be corrupted
- 🛠️ Use when there is a fatal error, and the machine does not work
CC Estefany María Cano Ochoa